Tesla EV Telematics Dashboard [CAN Bus + DBC + Grafana]
Case Studies / CSS Electronics

CSS Electronics
CSS Electronics is a developer of CAN bus hardware incl. CAN/LIN data loggers and sensor-to-CAN modules [Note: This is an 'in-house' case study].
What problem did you solve?
Logging data from a Tesla EV with the CANedge has been on my 'fun stuff to-do list' for a while.
In particular, I wanted to add Tesla to our list of case studies for popular electric cars, incl. the Kia EV6 and Nissan Leaf.
As per the other case studies, I also wanted to create a Tesla Grafana dashboard - and include the data in our 'EV data pack'.
Tip: Download the Tesla DBC, data and dashboard here!
Tip: See also our ChatGPT + CAN intro using the EV6 data!
Read similar case studies for the Enyaq, Kia EV6 and Nissan Leaf.

How did you solve it?
Step #1 is of course to get access to a Tesla.
Luckily, my father has a Tesla Model 3 (2019) and is (reasonably) comfortable with my vehicle interfacing skills.
My initial instinct was to simply bring a CANedge2 and an OBD2 adapter. However, as Tesla owners will know, most Tesla EVs do not have an OBD2 connector near the steering wheel - only an ethernet connector. Come on Elon!
However, creative minds have solved this: Insert a customized OBD2 adapter cable into the Tesla's wiring harness by disconnecting an existing connector.
Initially, I was reluctant: I'm comfortable using an existing vehicle connector - but it's something else to separate existing connectors to inject a 3rd party adapter cable. However, after talking with a couple of CANedge end users that successfully logged data from their Teslas this way, I decided to give it a shot. And after all it wasn't my own car.
Before we proceed, a warning:
If you replicate this, do so with caution and at your own risk.
Here are the steps:
- Get a Tesla OBD2 adapter (details below)
- Get a CANedge + DB9-OBD2 adapter
- Follow the steps in this video to install the Tesla OBD2 adapter
- Connect the CANedge to the DB9-ODB2 adapter
- Connect the DB9-OBD2 and Tesla OBD adapters
- Start the Tesla up again
Your CANedge will now log data from the Tesla.
Note that installing a data acquisition device in this way should only be done if you know 100% what you're doing and you are aware of the safety and warranty related risks. In particular, the warranty of the car will most likely be void if you're actively using a device physically connected to the vehicle bus through a 3rd party adapter cable at the same time.
This installation differs substantially from 'normal' installations via e.g. the OBD2 or J1939 port in a vehicle and should be treated accordingly.
You can get Tesla OBD2 adapters from various sources, incl. Amazon, Aliexpress, local distributors etc. As an example, I ordered this one from Aliexpress.
Generally, I'd recommend ordering from a local distributor if available. You may also consider asking them if they perform some form of testing of the cables to ensure their quality. It's important to note that this adapter cable reconnects 15+ wires, meaning that poor quality, incorrect wiring etc. may cause issues and could potentially be safety critical. It's clear that many use these types of cables in their EVs, but it's a far more "risky" way to perform data acquisition vs. e.g. connecting via a standard OBD2 connector.
A few important notes:
- The compatible Tesla OBD2 adapter cable depends on your production year. The one I used was compatible with the Tesla Model 3 2019+ models (with the test car being from 2019 March)
- The Tesla OBD2 adapter and installation method also differs by vehicle type - so e.g. the Tesla Model Y and X may require different adapter and installations. We recommend doing some extra research if you aim to try this out in other models than the Tesla Model 3
It's important to note that the vehicle must be shut down before installing the adapter cable. This requires following the steps in the video linked above - and in particular, you need to wait some minutes until your hear the audible "chunk" sound of the shutdown.
According to online sources, not waiting may cause damage to your car.
Be aware that opening doors or putting weight on the driver's seat may "start up" the vehicle again, so consider doing the safe shutdown with all doors closed and while you're sitting on the backseat.
No request messages are required to log the relevant Tesla data, it is simply broadcast. In other words, you can use the default CANedge Configuration File if your aim is simply to record everything.
A lot of data is generated, however, so for longer duration logging you may want to apply filters and prescalers to eliminate irrelevant data that cannot be DBC decoded.
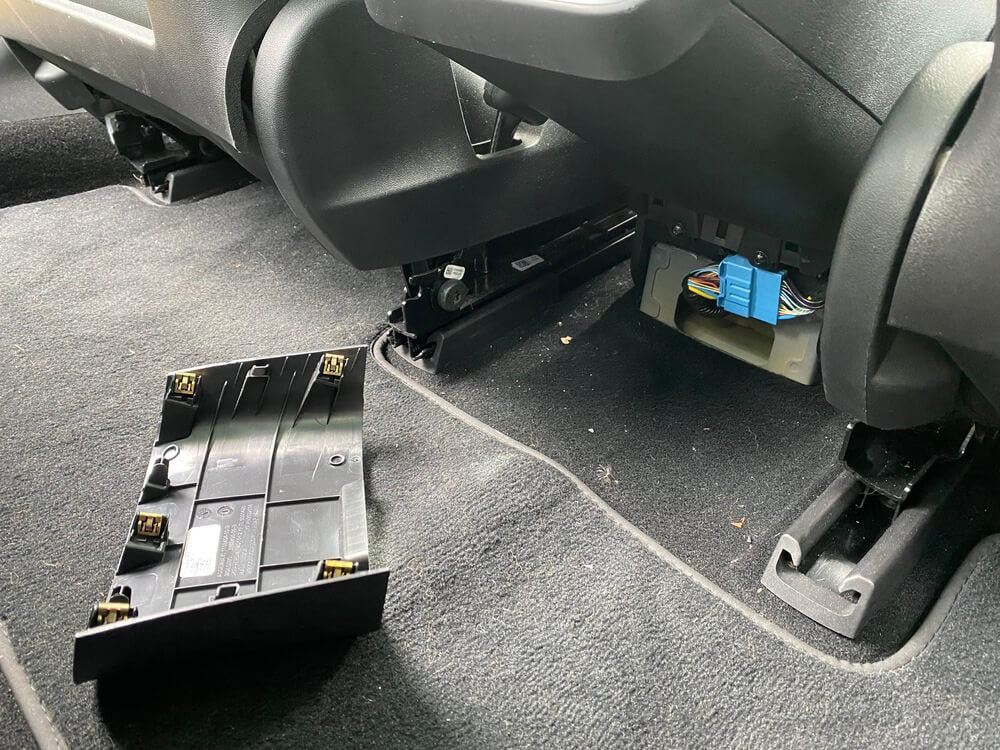 Tesla Model 3 (2019) wiring harness location
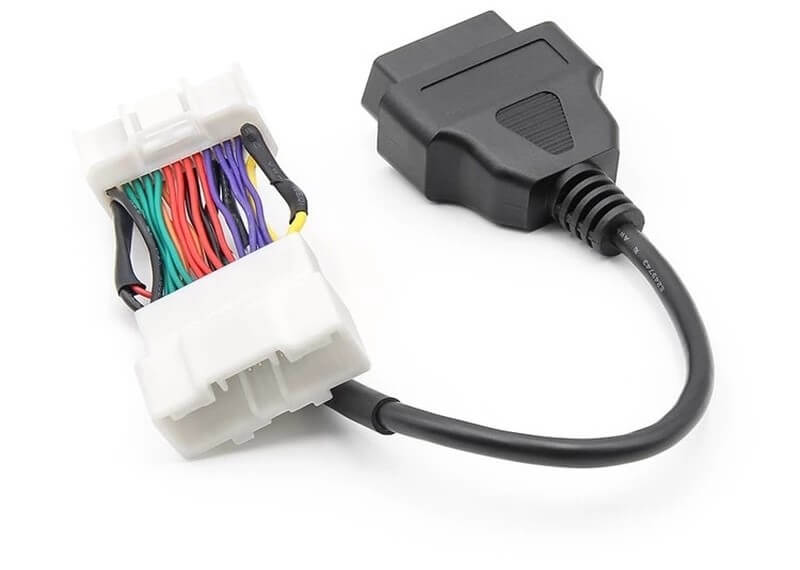 Tesla Model 3 (2019) OBD2 adapter
Analyzing the data and validating DBC
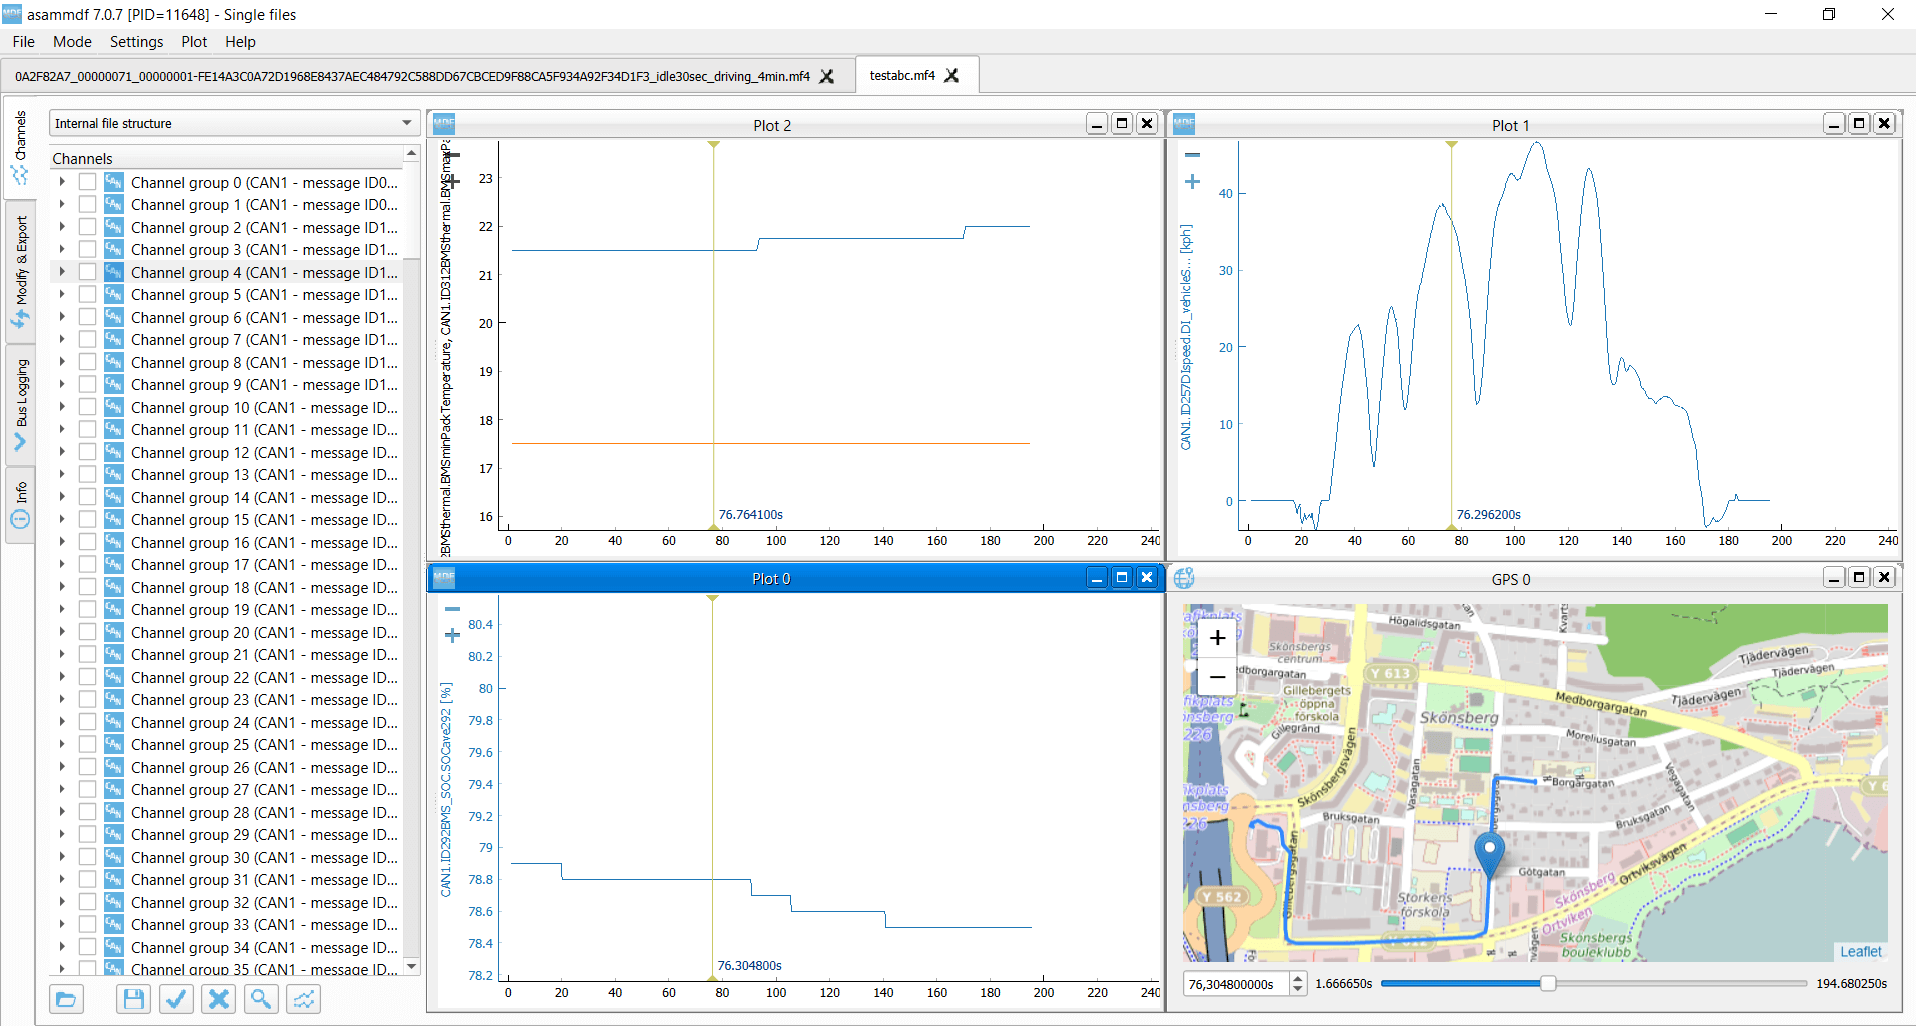
After driving a trip in the Tesla with my CANedge, I collected the log file data and loaded it into the asammdf GUI.
In addition, I loaded a Tesla Model 3 DBC file from github to decode the data. A few observations:
- The Tesla produces ~2,700 frames/second
- The Tesla data contains 300+ CAN IDs
- The DBC is able to decode ~120 CAN IDs (~40%)
- This corresponds to almost 2,000 signals
Below are examples of parameters from the Tesla EV
- Tire pressure
- Tire temperature
- Brake temperature
- State of charge (%)
- Power consumption
- Regeneration effects
- Charging data
- Door locks
- Speed, RPM, ...
- Temperatures (indoor, oil, ...)
- Torque data
- Brake/acceleration pedal data
- Steering angle/speed
- Wiper status
- ... and much more (see playground)
Creating a Grafana dashboard
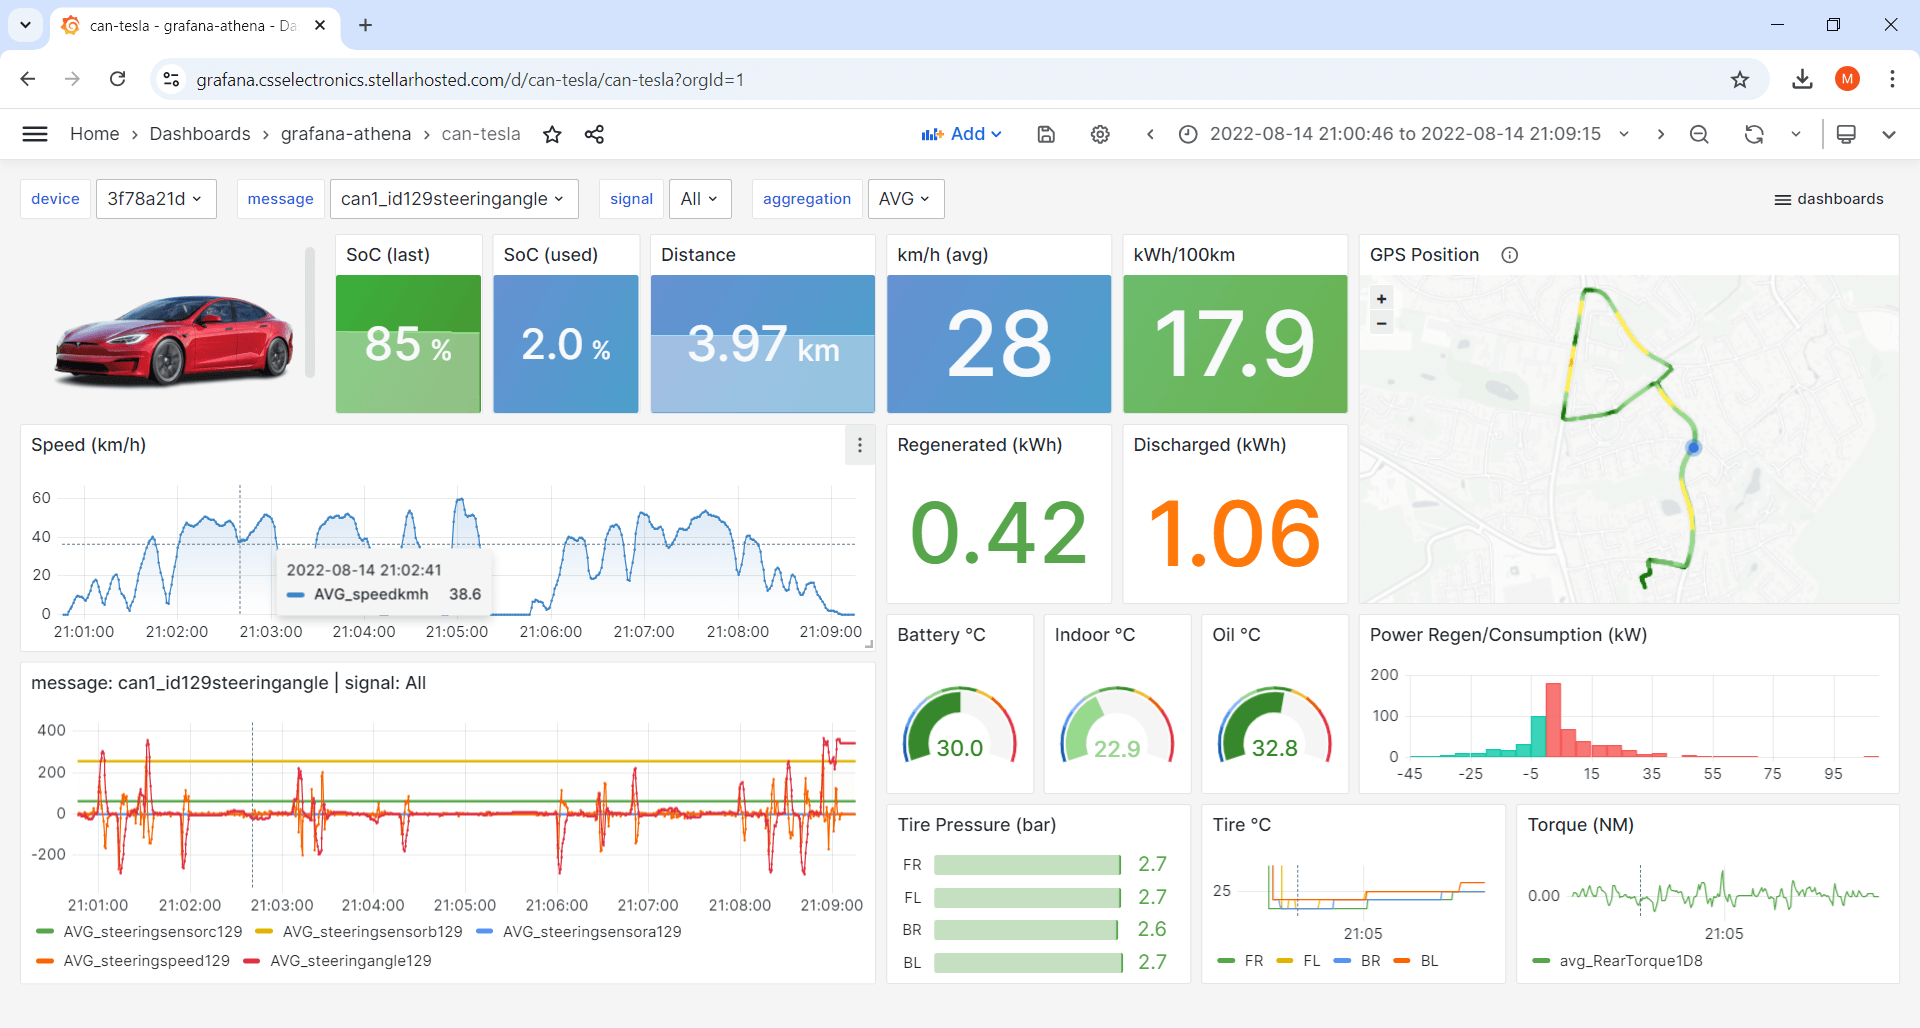
As in my other EV case studies, I wanted to visualize the Tesla data in a Grafana dashboard.
To do so, I used our Grafana-Athena integration.
Specifically, I used the MF4 decoders to DBC decode the raw MF4 files into a local Parquet data lake, which I then uploaded to our S3 output bucket (where our Grafana dashboard playgrounds are stored). For a more permanent deployment, this process would of course be automated via the Grafana-Athena Lambda automation workflow. Next, I copied my Kia EV6 dashboard template and modified the queries to replace the Kia EV6 DBC signal names for the Tesla signal names.
I was able to identify most of the same signals, enabling almost identical data representations.
In particular, I used the same technique to create a 'kWh / 100 km' panel as in the Kia case (via Grafana transformations).
The resulting dashboard can be seen via the playground, which you can copy/paste into your own Grafana account if you wish to reuse it.
A cool functionality in Grafana is the ability to create "delta" values, deducting the first from the last value for a signal. This allowed me to take 'accumulated' signals like BMS_kwhDriveDischargeTotal and BMS_kwhRegenChargeTotal and convert them to "trip" signals, showing how much energy in kWh was discharged/regenerated for a specific period.
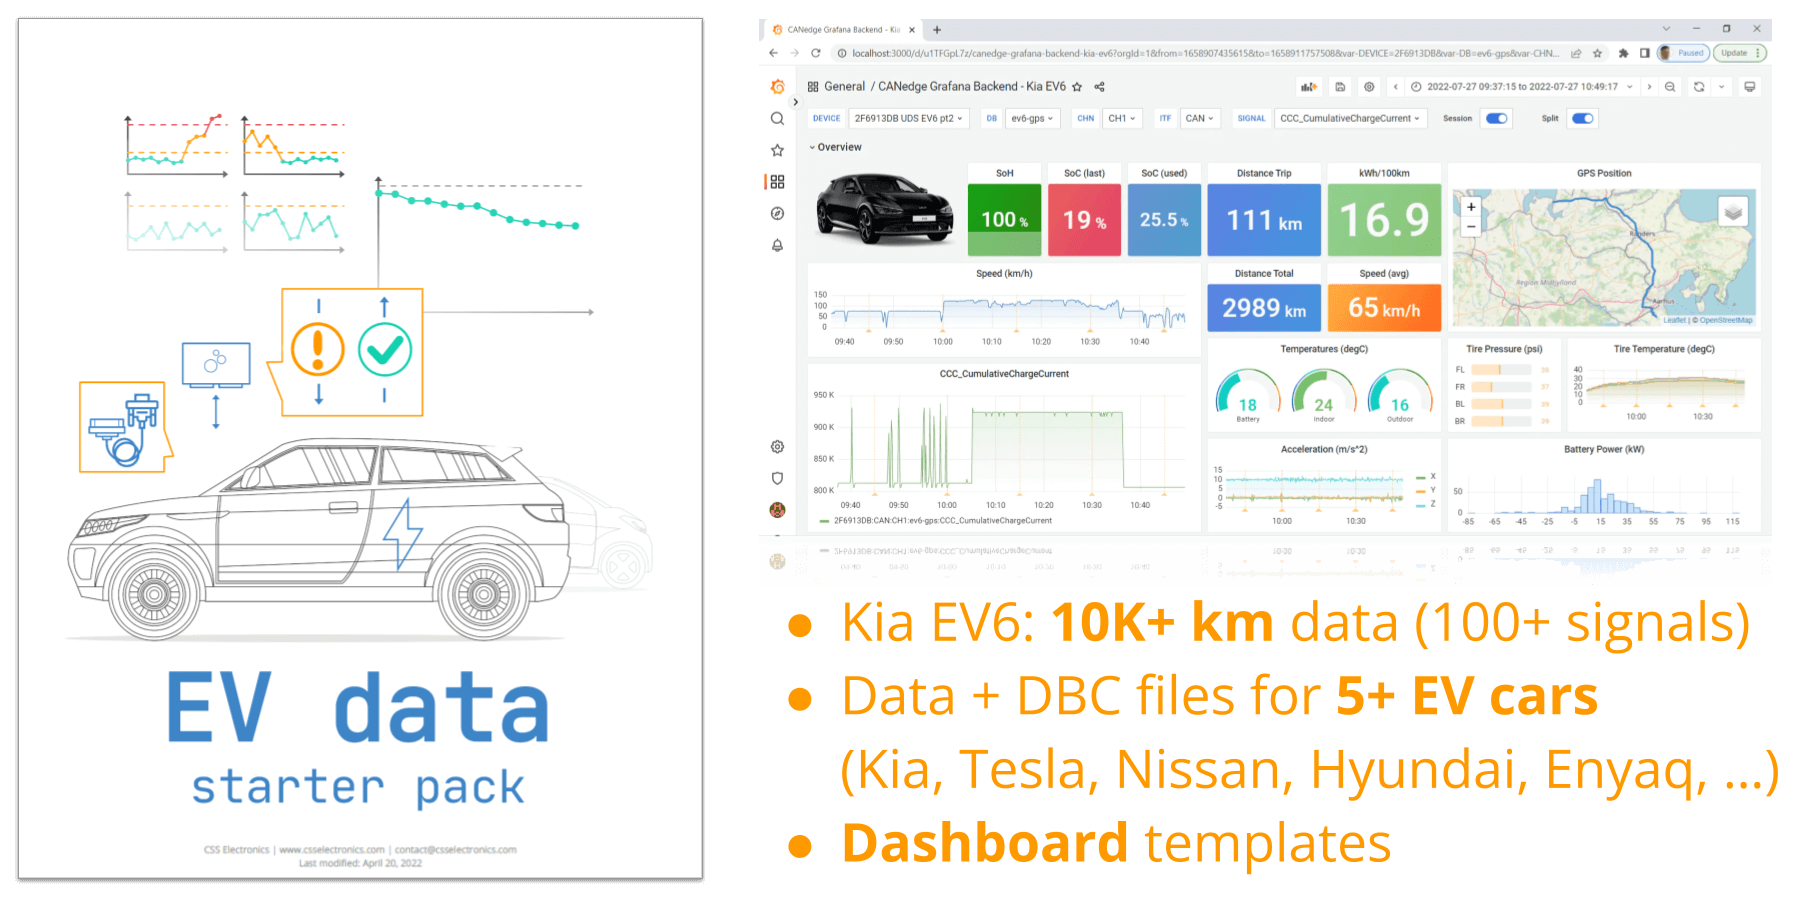
Get the 'EV data pack'
Want to work with real electric car data?
Download your 'EV data pack' - incl. sample data, configuration files & DBC files from popular electric cars:
- Kia EV6 (10K+ km data)
- Nissan Leaf
- Tesla Model 3
- Skoda Enyaq
- and more ...
What benefit has this led to?
This case study showcases how you can collect data from a Tesla Model 3 - with similar implementations for the Tesla Model Y / X.
Further, this is a cool example of how much data you can sometimes get from 'public' DBC files decoding proprietary data. I don't know how somebody created this DBC, but all the signals I reviewed seem legit. Note how the playground has 1,000+ signals available from the dropdown.
I also found it interesting to be able to display discharged vs. regenerated energy directly for a given time period. As evident from the playground, regeneration is extremely impactful when e.g. commuting in cities - and it's a nice way of illustrating why it's so important to use the e-pedal in EVs (as also shown in our Kia EV6 case study).
If you want to try this in your own Tesla, feel free to contact us!
— Martin Falch, co-owner at CSS Electronics
Ready to log data from your EV?
Get your CAN logger today!
