 DIRECT ACCESS
Skip OBD2/J1939 connectors - connect directly to the CAN wires
 CONTACTLESS
CAN data is logged without cutting wires (warranty kept)
 EASILY POWER
Power via the 5V CANedge CH2 power out
 STRONG GRIP
Perpendicular fixation ensures that the CAN wires do not slip
 PLUG & PLAY
Simple to set up - ready to log in seconds with your CAN logger
 100% SILENT
Works in "listen only" mode and does not affect the CAN bus
About the CANCrocodile
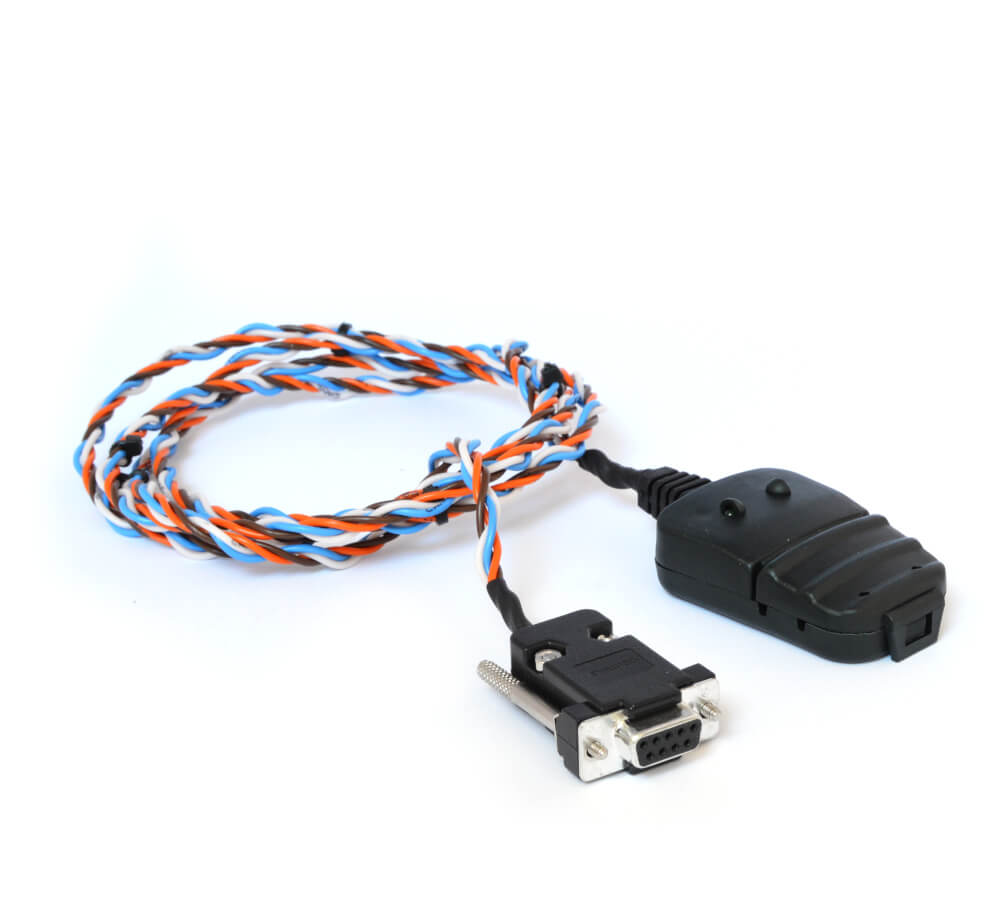
The CANCrocodile enables safe reading of data from the CAN L/H wiring harness (e.g. in vehicles). It can be used to connect your CAN logger e.g. when connectors are not available - or if a contactless CAN bus reader is preferred for warranty purposes.
If you need to only log data via Channel 1, we recommend our contactless CAN reader (CH1). However, if you need to log 2x CAN buses, the CH2 CANCrocodile can be powered via the CANedge 2nd port. You can also mix adapters - e.g. a contactless CAN reader (CH1) plus this CH2 CANCrocodile - or a DB9-J1939 + CH2 CANCrocodile etc.
use cases
Installation

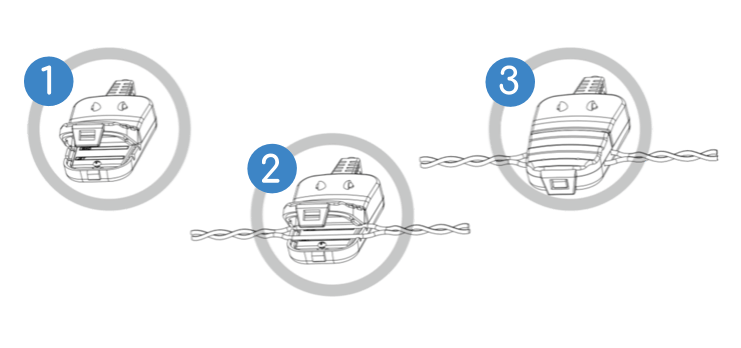
To connect the CANCrocodile head, follow the below:
- Open the CANCrocodile housing
- Place the CAN-H/CAN-L wires on the marked surface
- Close the housing, engaging the latch
- Optionally seal the housing (recommended)
Next, connect the CANCrocodile to your CANedge:
- Connect the CANcrocodile to the CANedge CH2
- In the CANedge config, enable 2nd port power
- Set the CANedge bit-rate to match the CAN bus
- Ensure the CANedge CAN CH2 Mode is set to 'Normal'
- Power the CANedge via CH1 (e.g. via another adapter)
Check out our tech specs, use cases or FAQ - or buy now!
Do you have any questions?
Contact usWe encourage you to read the full CANCrocodile installation manual before use.
| GENERAL | |
|---|---|
| CANCrocodile Cable Length | 70 cm |
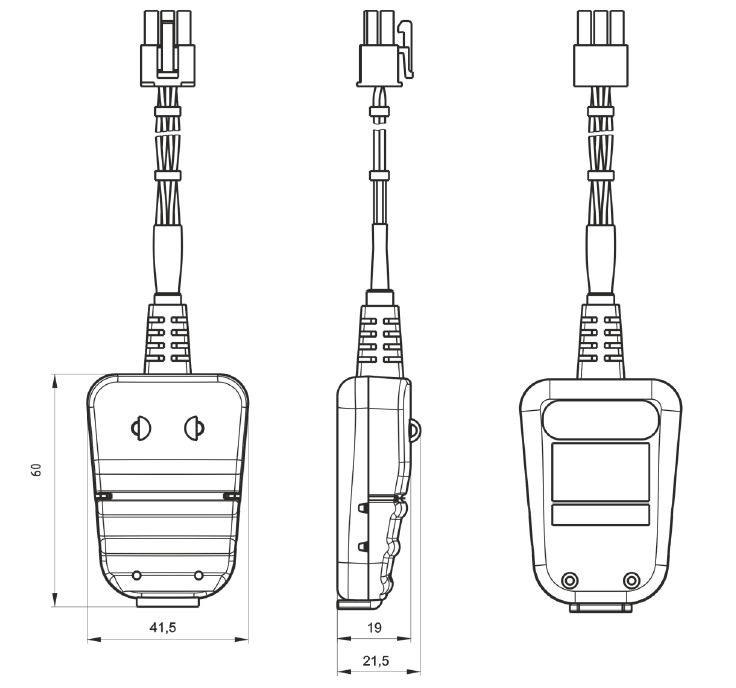
| CANCrocodile Body | See drawing further below |
| CH2 DB9 Adapter Pins | In accordance with CiA 303-1 |
| Compatibility | High Speed CAN Bus (ISO 11898-2) incl. SAE J1939, OBD2, NMEA, CANopen |
| CAN FD is not supported (this generally applies to contactless CAN readers) | |
| Bit Rates | from 5K up to 1M |
| Nominal Supply Voltage | 5 V (matching CANedge 2nd port power out) |
| LEDs | Red: Power on; Green: CAN bus data read |
| Termination | The CANCrocodile is internally terminated (120 Ohm) |
| Temperature | Operating temperature: -20degC to +80degC |
| Weight (excl. CAN logger) | 100G |
| IP Rating | IP30 |
Product Dimensions

CH2 Adapter pinout
| DB9 (female) | Function |
| 1 | VCC |
| 2 | CAN-L |
| 3 | GND |
| 4 | |
| 5 | |
| 6 | |
| 7 | CAN-H |
| 8 | |
| 9 |
Below are examples where the CANCrocodile CH2 can be useful:

Dual CAN logging
Need to record data from 2 x CAN channels?
In many heavy duty vehicles you'll need to record data from two CAN channels. In this case, you can e.g. power the CANedge via channel 1 via a DB9-J1939 adapter - and use a CANCrocodile CH2 variant to log data from a raw wiring harness via channel 2.
For most standard purposes, you'll be able to use just a DB9-OBD2 or DB9-J1939 connector for your CAN logger. However, various scenarios exist where this is not an option:
- The OBD2/J1939 connector ports may be non-existing in the specific vehicle
- Other CAN tools may block the relevant connector port (or it may need to be free for mechanics)
- A connector port is available, but the manufacturer has set it up to not parse the CAN data through
- A vehicle/machine may have e.g. two high-speed CAN buses - and the one you need to log from may lack a connector
Further, while the CANedge/CLX000 can operate in Silent Mode without the CANCrocodile, some users may find extra comfort in the CANCrocodile setup as this is physically separated from the system, i.e. with no electrical connection. For the same reason, the CANCrocodile adapter is often referred to as a contactless CAN reader.
For pure "listening" use cases where you need to log data, the CANCrocodile performs equally to having a direct connection (i.e. cutting the wires or connecting via e.g. a J1939 deutsch connector port).
In some cases, you may experience up to 1% message loss according to specifications. However, in our extensive testing, we found that the loss rate was less than 1 per 250,000 messages at the highest rate (1 Mbps).
If you need to log on-demand messages (rather than only broadcasted CAN data), you'll need to be able to transmit request messages to various ECUs - in which case the CANCrocodile will not work as it is a 100% contactless CAN bus reader (meaning transmission of data is impossible).
Instead, you'll need to configure the Transmit list of the CAN logger to send the relevant requests and then connect it directly (e.g. via a connector port).
In a standard vehicle (e.g. a car), you'll often be able to locate the CAN wires behind an OBD2/J1939 connector or the ECU ABS/ASR connector. The CAN wires are twisted and can often be recognized by their color.
For a more extensive guide, see the CANCrocodile CAN reader manual under Tech Specs.